Snapshots - Tabular Data Exchange in SpreadSheets
You can send a range/table/worksheet to other people without leaving Excel.
Let us make an example:
Alice works on a complex Excel spreadsheet and needs to send a table included in such a spreadsheet to her colleague Bob. Instead of copy-pasting the range into a temporary spreadsheet and attaching it to an email message, she selects the table and directly invokes the SpreadSheetSpace Send functionality. All in one click.
Bob receives a notification, invokes the SpreadSheetSpace Receive functionality and incorporates the Alice's data range in his spreadsheet at the cursor position. Again, just one click.
No more copy-paste, no more temporary files, no more errors, but direct Excel to Excel data exchange, one-click operation, Format/Style preservation.
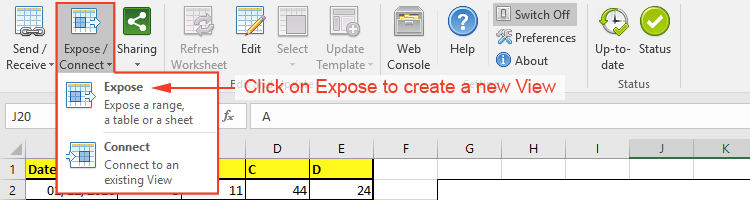
Create and send a new Snapshot
- Select the range, table or worksheet you would like to send as a Snapshot;
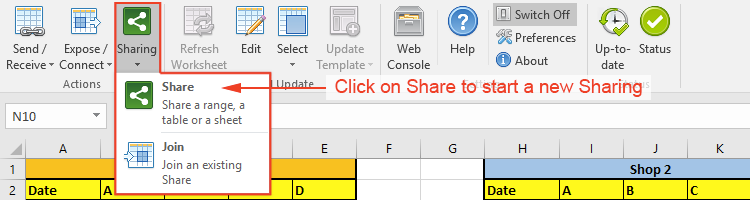
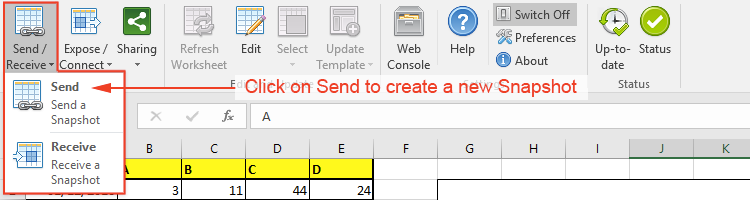
you will be able to select or edit the actual selection afterwards. - In the SpreadSheetSpace panel, click on the Send / Receive button and then select Send.
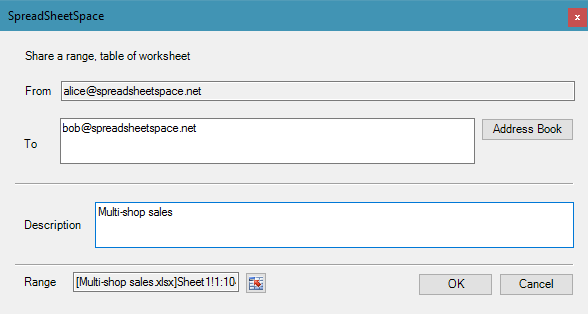
- Insert recipients email addresses and a short description of the new Snapshot;
in the Range field will be shown the previously selected area, if you want you can edit it by clicking on the side button.
To finally send the new Snapshot press OK.

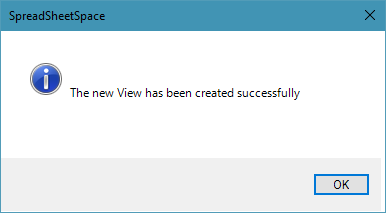
- A new window will inform you that the Snapshot has been sent.

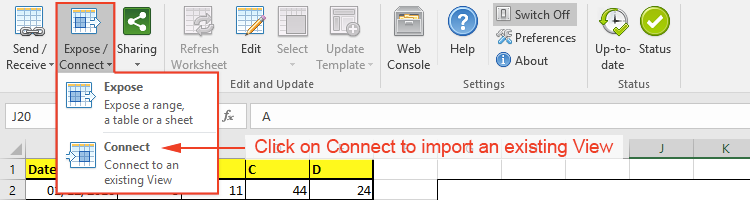
Receive an existing Snapshot
- Select the cell in which you would like to import the desired Snapshot; the content of the Snapshot will be imported starting by the selected cell.
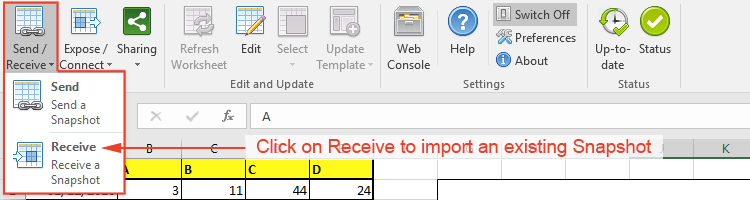
If the desired Snapshot contains a full worksheet, it will automatically be created a new worksheet named to reflect Snapshot's description. - In the SpreadSheetSpace panel, click on the Send / Receive button and then select Receive.
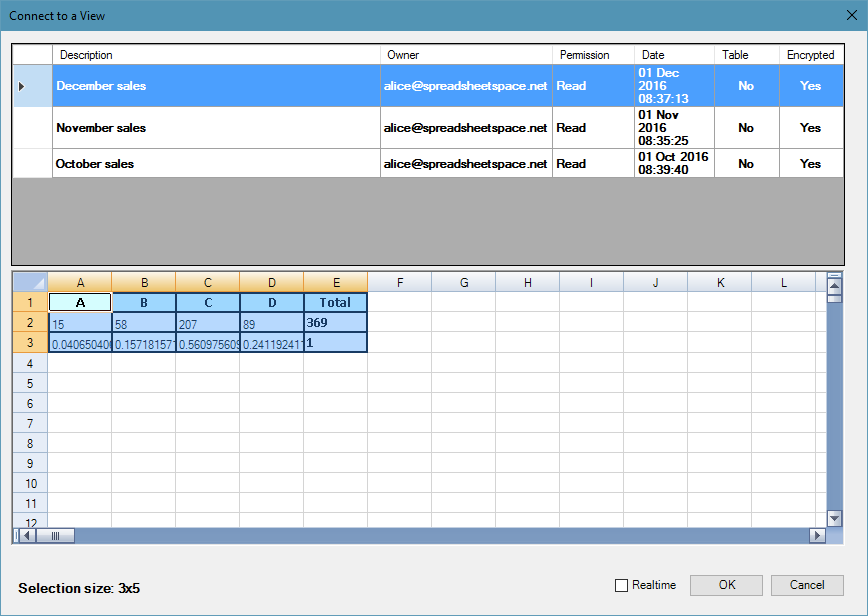
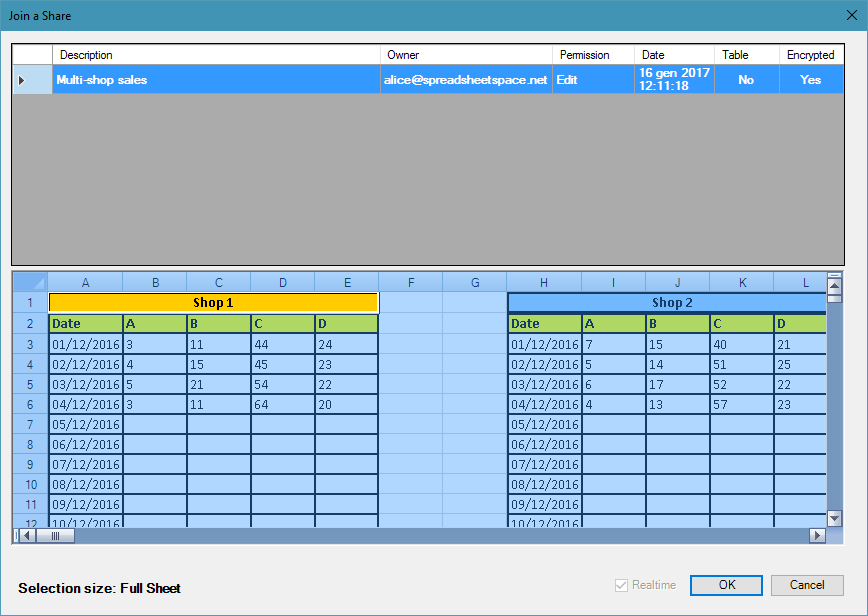
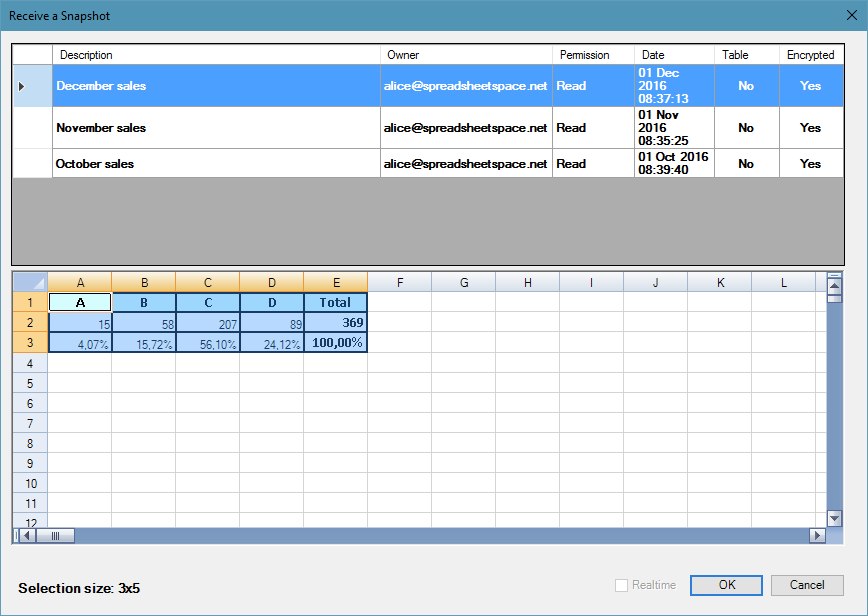
- Select the Snapshot you wish to import from the list and then press the OK button;
To facilitate selection, in the lower section will be displayed a preview of the currently selected Snapshot's content and at the bottom will be indicated the size of the area it contains.
- Selected Snapshot's content will be imported in your Excel worksheet.